
 Art Classes & Workshops
 Summer Camps
 Ground Floor Gallery
 Ground Floor Window
 Print Studio
 About
About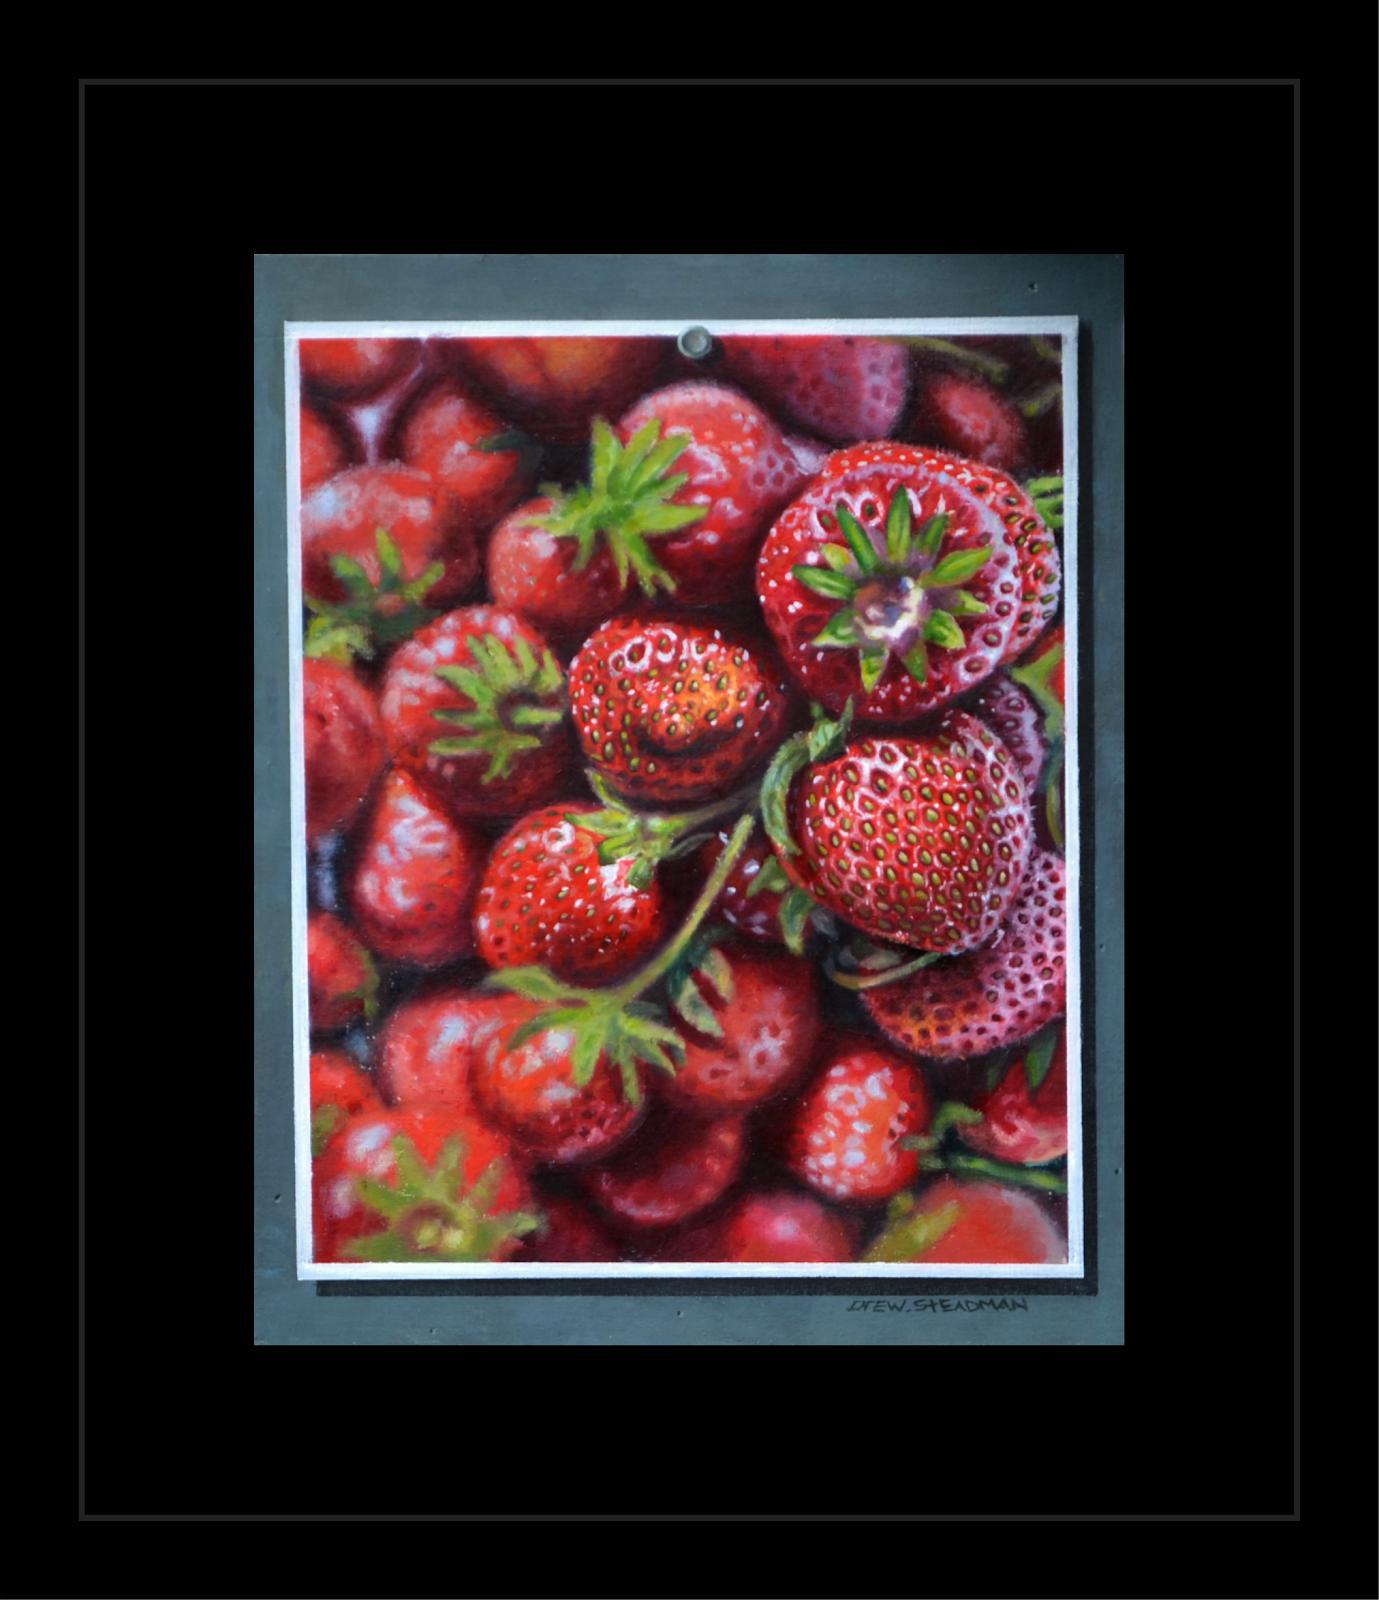

I have had quite a few people ask me how I make objects to appear blurry in my paintings. I love creating certain objects to look out of focus in my paintings to create more interest in the composition,help create focal points and develop a sense of depth.
I am a high-definition realist painter, working mostly from my own photo references on hard board such as masonite and birch boards, but these techniques and ideas can also be used on canvas, when working from life, as well as with different painting styles including works with looser brushwork, impressionistic, and plein air landscape painting etc.
Getting Started
Once I have set up a still life composition in my studio that I'm happy with, which can take up to an hour, constantly taking photos,rearranging elements and lighting.
Then I take three photos:
The first, with the elements I want to be in focus, as sharp and clear as possible

A second that is slightly out of focus

And finally a third image that is completely out of focus

You can do this manually by taking three pictures each one more blurred than the next or you can take one photo and blur the picture digitally in a photo editing program.
I use all three references in my process. I might use the the clear in-focus photo to paint the cherries in the photo nearest to us (on top of the pile) in greater resolution and use the second and third blurry photo references to paint the receding cherries to create a more interesting composite.
There are a few things I keep in mind and carefully consider while working on a painting.
To create realistic paintings and blurred objects you can not rely on intuition, you need to be deliberate in your mark making and make logical steps throughout the process, knowing that each layer of paint will affect the subsequent layer. You should constantly be checking and comparing your drawing, colour (especially value and chroma) as well as your edges with your reference. Also it is important to have a good understanding of colour theory and how to mix and match colours correctly. I would suggest checking out and watching Paul Foxtons videos on youtube to learn or brush up on these concepts.
Decision Making and a Deliberate Method
I work in the indirect painting method which means i paint in many thin layers with very little paint loaded on my brush, letting the painting completely dry before working on the next layer.
To create soft edges I often do not blend paint together (wet on wet) on the board (or canvas). I avoid doing this because blending or mixing different colours on the board can result in unwanted changes in colour, temperature, value and chroma.
For example if you are painting a yellow sunflower with a blue sky behind it and you try and blend the edges of the flower with the blue sky, you will end up with greenish petals. So instead, I might paint the sky up to the edge of the flower petals and let it dry completely before working on the flower. It may take many layers going back and forth between painting the flowers over the sky and then the the sky over the flowers softened edge.
The final layer of paint would usually be the yellow petal layered in semi transparency over the blue sky. Although, you can blend wet on wet in many cases; for example if you were painting that same yellow sunflower in front of a yellow wall, you could blend the edges together (wet on wet) and it wouldn't effect the colour too greatly.
Another important technique, is to preserve the areas where you will place your highlights, so not to pollute the area. When looking at the cherries above you can see that the highlights are a light blue from the reflected sky, so what I would do right from the start is try to keep those areas clean of any other colours, such as the reds or dark purples surrounding it.
Once i'm happy and nearly finished the cherries, I would then come in and glaze the light blue with a small amount of linseed oil (for sharper, glossier highlights) and scumble the paint on with a brush that is nearly dry, with very little paint on it (for a fuzzier, more blurry highlight). I should also add that using little to no medium to your paint and scumbling the paint on the painting surface almost like you were using a dry media such as charcoal, can produce a soft, fuzzy and out of focus appearance.
A few helpful tools
One really important tool i use to soften my edges and create subtle value shifts present in a blurry object, is a round softener, blending brush (make sure you clean it after each use to make sure the bristles stay soft). You should always have a few of these in different sizes. These brushes are used to smooth out and blend the paint already applied to the board (or canvas), and I do not use these brushes to apply the paint.
Depending on the specific task, I use different size brushes and try to take great care of them, especially my smaller detailed brushes. Although, when the brush has frayed and no longer holds a point, I do not throw it away. Instead i can use these brushes for the more aggressive scumbling involved with creating a blurry object.
If you are impatient and do not like to wait for the paint to dry, you can purchase quick dry mediums that work really well. I usually use this for the block in stage of my painting, so i can quickly get into the fun bits.


More from this artist |
Drew Steadman was born and raised in Guelph Ontario. He is a trompe l'oeil artist painting primarily smaller high definition still life and vanitas works. To view more of his paintings,to purchase or arrange commissions follow him on Instagram at drewsteadman_art or contact him through email at steadmandrew@hotmail.com |
5 comments
Dan C
Perfect answer to the question I was hoping to find. Thanks for not only detailing the techniques but also why – i.e. wet on wet vs dry on the board. Much love!
Gary Sevek
Drew, Thank you for your description of these varied techniques, for ‘blurring a background’. The information you provide is very clear and succinct. I am a self taught (still learning) painter, and really value good information from experienced painters, as yourself. My next piece requires a blurred background in order to be, in my mind, truly successful. I am excited to get it started, and your techniques should help me a great deal. Thanks again, and good luck in your future endeavors.
Sue Van Oosterom
Thanks so much for the article on blurring..most helpful..
dylan leo
Thank you for your blog.
Zuri
Thank you.✨